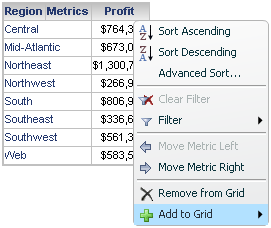
You can enable filtering, drilling, and moving objects in a grid in
Flash Mode. To do this, you must enable a context menu to quickly access
these data manipulations, as shown in the image below. These manipulations
can then be performed directly in Flash Mode and applied to data displayed
as a grid, or as a grid and graph.
The table below lists the manipulations you can perform on data displayed
in grids in Flash Mode, and the steps and privileges required to perform
them.
|
Goal |
Privileges |
Steps |
|
Sort data in a row or column |
Web Sort |
Open the document in Flash
Mode. Hover the cursor over the header of
the row or column. The context menu icon  is displayed in the top right. is displayed in the top right. Click the context menu icon .
The context menu is displayed. Do one of the following: |
|
Sort data using multiple conditions |
Web Sort |
Open the document in Flash
Mode. Hover the cursor over a row or column
header. The context menu icon is displayed in the top right. Click the context menu icon .
The context menu is displayed. Select Advanced
Sort. The Sort dialog box opens. -
Do one of the following:
From the Sort
by drop-down list, select the attribute form or metric to use to
sort data. Do one of the following: Specify additional sorting criteria
using the appropriate steps above. Click OK
to apply changes. |
|
Pivot a row or column in the grid
Note: If you choose to move
a metric to the rows or the columns of a grid, all metrics in the grid
will be moved to the same axis. |
Web Pivot Report |
Open the document in Flash
Mode. Hover the cursor over the header of
the row or column. The context menu icon is displayed in the top right. Click the context menu icon .
The context menu is displayed. Do one of the following:
|
|
Filter data based on the value of a metric |
Web Use View Filter Editor |
Open the document in Flash
Mode. Hover the cursor over the header of
the metric. The context menu icon is displayed in the top right. Click the context menu icon .
The context menu is displayed. Point to Filter,
then specify the conditions to use to filter the data by typing a metric
value in the appropriate field. For detailed information on each filtering
option, see
Filtering
data in documents in Flash Mode. Click OK
to save changes. The context menu icon  appears in the top right, indicating that
you have defined a filter on the metric. appears in the top right, indicating that
you have defined a filter on the metric. |
|
Filter data based on a list of attribute elements |
Web Use View Filter Editor |
Open the document in Flash
Mode. Hover the cursor over the header of
the attribute you want to use to filter data. The context menu icon
is displayed in the top right. Click the context menu icon .
The context menu is displayed. Point to Filter.
Depending on the number of elements in the attribute, Web displays either
a context menu containing each element of the attribute, or a search form
in which to search for and filter large numbers of attribute elements.
For
detailed information and steps to filter data based on a list of attribute
elements, see
Filtering
data in documents in Flash Mode. Click OK
to save changes. The context menu icon appears in the top right, indicating that
you have defined a filter on the attribute. |
|
Filter data to only include data for a selected attribute element |
Web Filter On Selections |
Open the document in Flash
Mode. Hover the cursor over the attribute
element to use to filter data. The context menu icon is displayed in the top right. Click the context menu icon .
The context menu is displayed. Select Keep
Only. The data in the grid is filtered to only include data for
the selected element. |
|
Filter data by excluding data for a selected attribute element |
Web Filter On Selections |
Open the document in Flash
Mode. Hover the cursor over the attribute
element to use to filter data. The context menu icon is displayed in the top right. Click the context menu icon .
The context menu is displayed. Select Exclude.
The data in the grid is filtered to exclude data for the selected element. |
|
Clear filter conditions and display all data in the grid |
Web Use View Filter Editor |
Open the document in Flash
Mode. Hover the cursor over a row or column
header. The context menu icon is displayed in the top right. Click the context menu icon .
The context menu is displayed. Click Clear
Filter. |
|
Move an attribute to the first of the rows, or the first of the columns
in a grid |
Web Sort, Web Pivot Report |
Open the document in Flash
Mode. Hover the cursor over the attribute
you want to use to group data. The context menu icon is displayed in the top right. Click the context menu icon .
The context menu is displayed. Click Move
to Beginning. The attribute is moved to the far left of the rows
or the top of the columns on the grid, the data in the grid is sorted
by the attribute, and row/column header cells are merged. |
|
Add or remove report objects for display in the grid
Note: Only objects in the grid's
dataset report can be added to the grid. |
Web Modify Grid Level In Document |
Open the document in Flash
Mode. Hover the cursor over a row or column
header. The context menu icon is displayed in the top right. Click the context menu icon ,
then point to Add to Grid. The
context menu is displayed, with a list of attributes and metrics in the
document's dataset report. Click Attributes
or Metrics to expand or collapse
the list of attributes and metrics displayed. For each attribute or metric
you want to add or remove, do one of the following: Click OK.
The data in the grid is updated. |
|
Quickly remove a single report object from the grid
|
Web Modify Grid Level In Document |
Open the document in Flash
Mode. Hover the cursor over the header of
the row or column you want to remove. The context menu icon
is displayed in the top right. Click the context menu icon .
The context menu is displayed. Click Remove
from Grid. The row or column is removed from the grid. |
|
Drill within the grid's dataset report
Drilling lets you view report data at levels
other than that displayed in the report.
You can only drill to report objects within the dataset report that
are not included in the grid report. If all objects within the dataset
report are displayed in the grid, no drilling options are displayed. |
Drill Within Intelligent Cube, Web Drill And Link, Web Drill On Metrics,
Web Advanced Drilling |
Open the document in Flash
Mode. Hover the cursor over a row or column
header to drill from. The context menu icon is displayed in the top right. Click the context menu icon .
The context menu is displayed. Any objects to which you can drill are
listed at the top of the context menu. Select the object you want to drill
to. |
|
Open a linked report or document
A link is a connection in a document to another document or report.
For more information and steps to add a link to a document, see
Linking
in documents. |
Web Drill And Link |
Open the document in Flash
Mode. Hover the cursor over the header of
a row or column that contains a link. The context menu icon
is displayed in the top right. Click the context menu icon .
The context menu is displayed. The name of the linked report or document
is displayed at the top of the context menu. Select it to open the report
or document. |